DIYRE
G Bus VCA Compressor Kit
$850.00
- Full Kit
- Step-by-Step Guide
- Supported
- Repair Policy
- Advanced
Few pieces of gear say “mix glue” or “finished record” more than this classic stereo VCA bus compressor. Very few units are as recognizable and versatile at once. It shines equally well cleanly taming dynamics on acoustic instruments as giving a drum bus an unmistakable punch.
Over the past decade-and-a-half clones of this circuit have become a popular DIY project, with a plethora of mods available to more closely resemble the original console circuitry, or to add entirely new features. We’ve done both. We went back to the schematics for the original console for our design, making it as identical to using the actual console bus compressor as one can get. But we’ve also made all of the most popular mods available at the press of a button or turn of a knob. The G Bus is a purist’s dream and a gear modifier’s playground.
For even more about the design philosophy behind the G Bus, check out the "Design Notes" tab.
The best DIY experience
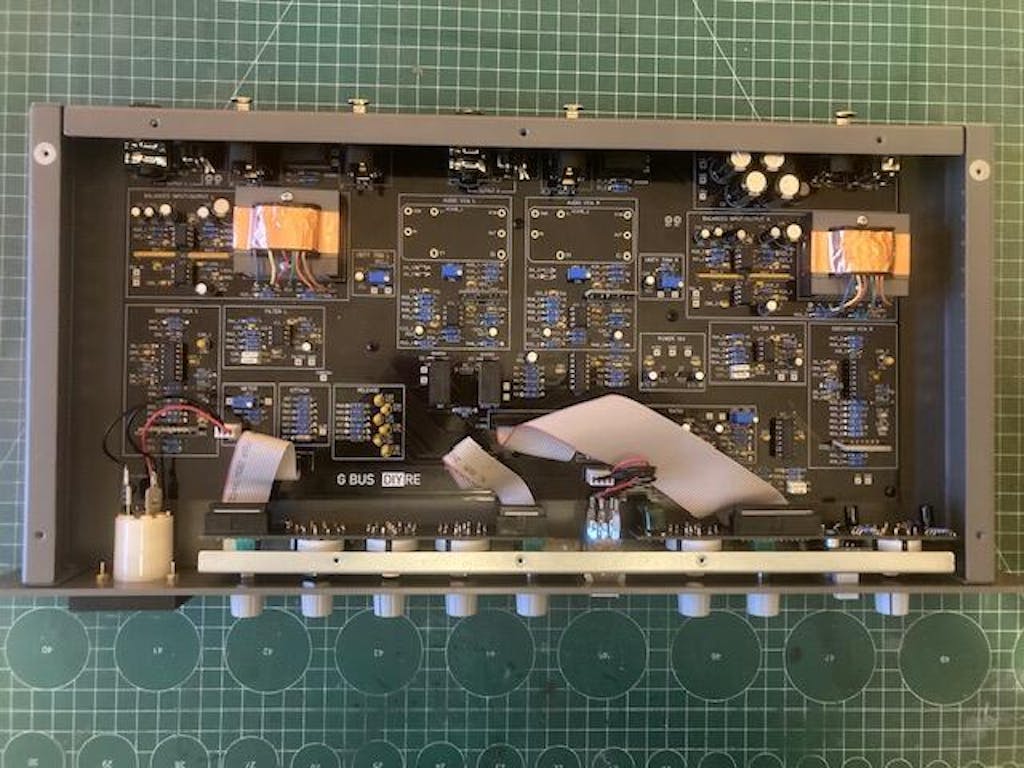
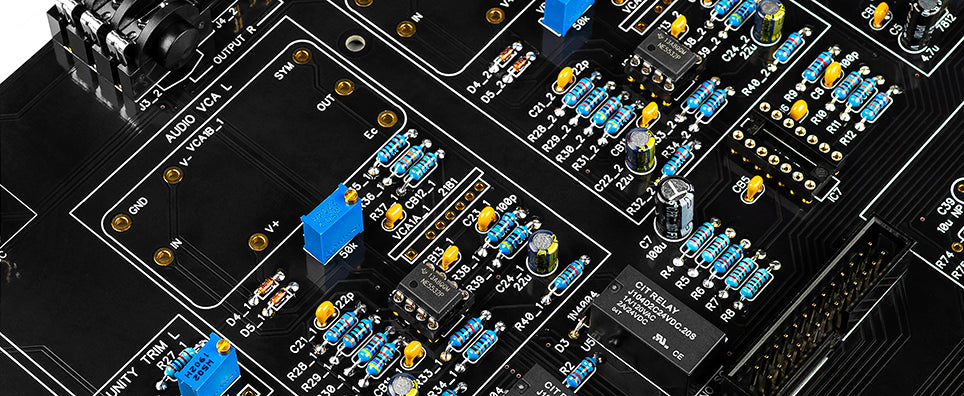
You can build the G Bus without any deep understanding of electronics or how compressors work. But by the time you're done you'll know a lot more about both. The build is split up into functional circuit blocks (Balanced Input, Attack, Ratio, etc.) and each section in the step-by-step guide begins with an explanation of what each block does and how key components work.
Of course, the moment we all live for is when you first power it up after placing every part yourself. But even before then you will already have had a fun, rewarding, educational experience.
The G Bus is an Advanced build intended for DIYers who have already built at least a couple smaller projects. You should be confident in your soldering ability, and be able to identify the correct orientation for capacitors, ICs, and diodes.

Full feature list
Compressor section
- Authentic circuit from the original console
- Classic attack, release, and ratio settings
- Four THAT 2181C VCAs for true stereo sidechain like the original
- Continuously variable pots for precise fine tuning of threshold and makeup gain
- 25dB of makeup gain
- External sidechain input
- Premium components like WIMA caps, Sifam knobs, and authentic meter and switches
Mod section
- Sidechain high pass filter (HPF) to prevent pumping on sources with big low end
- Switchable mono-summed sidechain
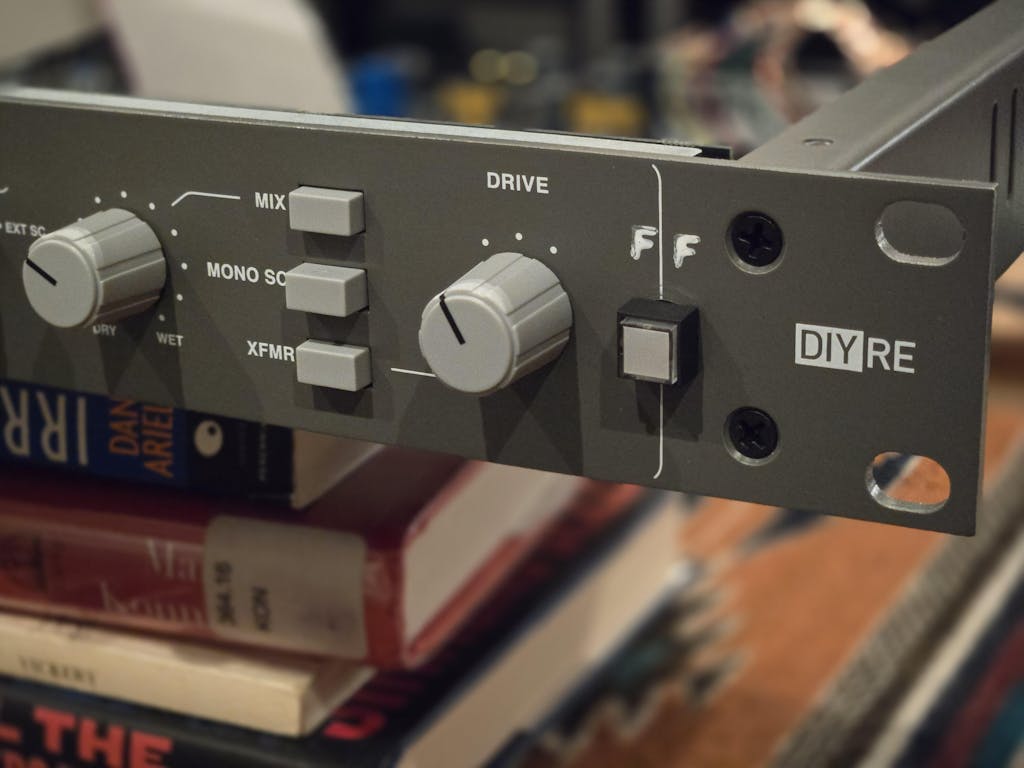
- Wet/dry mix control for easy parallel compression
- Engage transformers for added color and sonic weight, use for color even with compressor bypassed
- All mods can be switched out for console-authentic circuitry when not using mods
- Even more mods possible under the hood:
- Feed-forward mode
- Use vintage DBX VCAs
- Adjust almost any setting:
- THRESHOLD sensitivity
- ATTACK/RELEASE times
- RATIO
- MAKE-UP gain
- FILTER frequencies
- DRIVE amounts
- THRESHOLD sensitivity
Power supply
- Includes external, high-current (1.5A) power supply
- Accepts 110-220v wall power
- Regulated +/-16vDC and +48vDC outputs
- Connects to case via 5-pin XLR jack
- The External PSU is a universal, switch-mode power supply that provides +/-16v and 48v phantom power. It provides up to 2 amps of current on the 16v rails, which can power up to four PR502, Colour Duo, or G Bus units. Choose this option if you do not already have a PR502, Colour Duo, or G Bus.
- The THRU Cable can be used to daisy-chain power from one unit to another. The THRU Cable comes as a kit that you must solder together yourself.
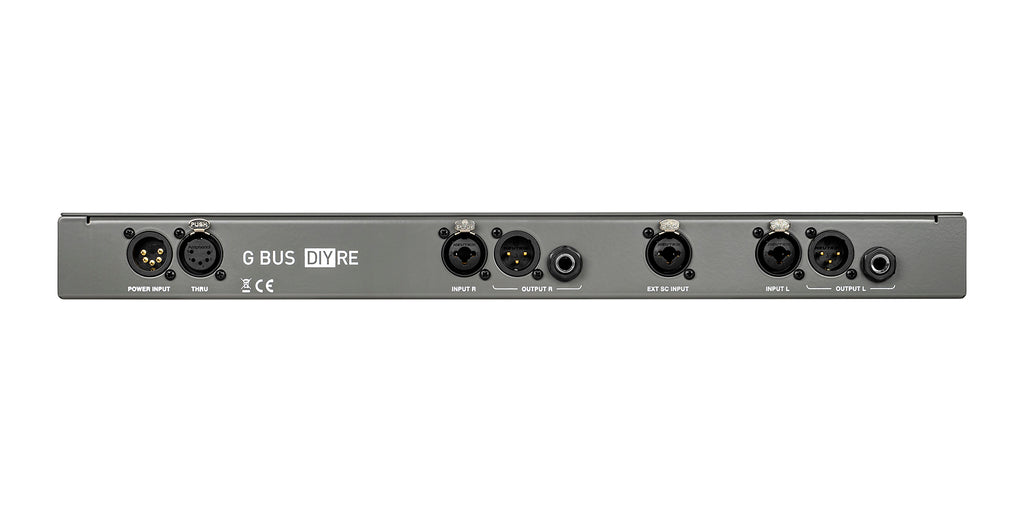
Connectivity
- 2 Combo XLR/TRS line inputs
- 2 XLR line outputs
- 2 TRS line outputs
- 1 Combo XLR/TRS external sidechain input
- 1U height 19” rack mount case
- Powder-coated steel chassis and front panel
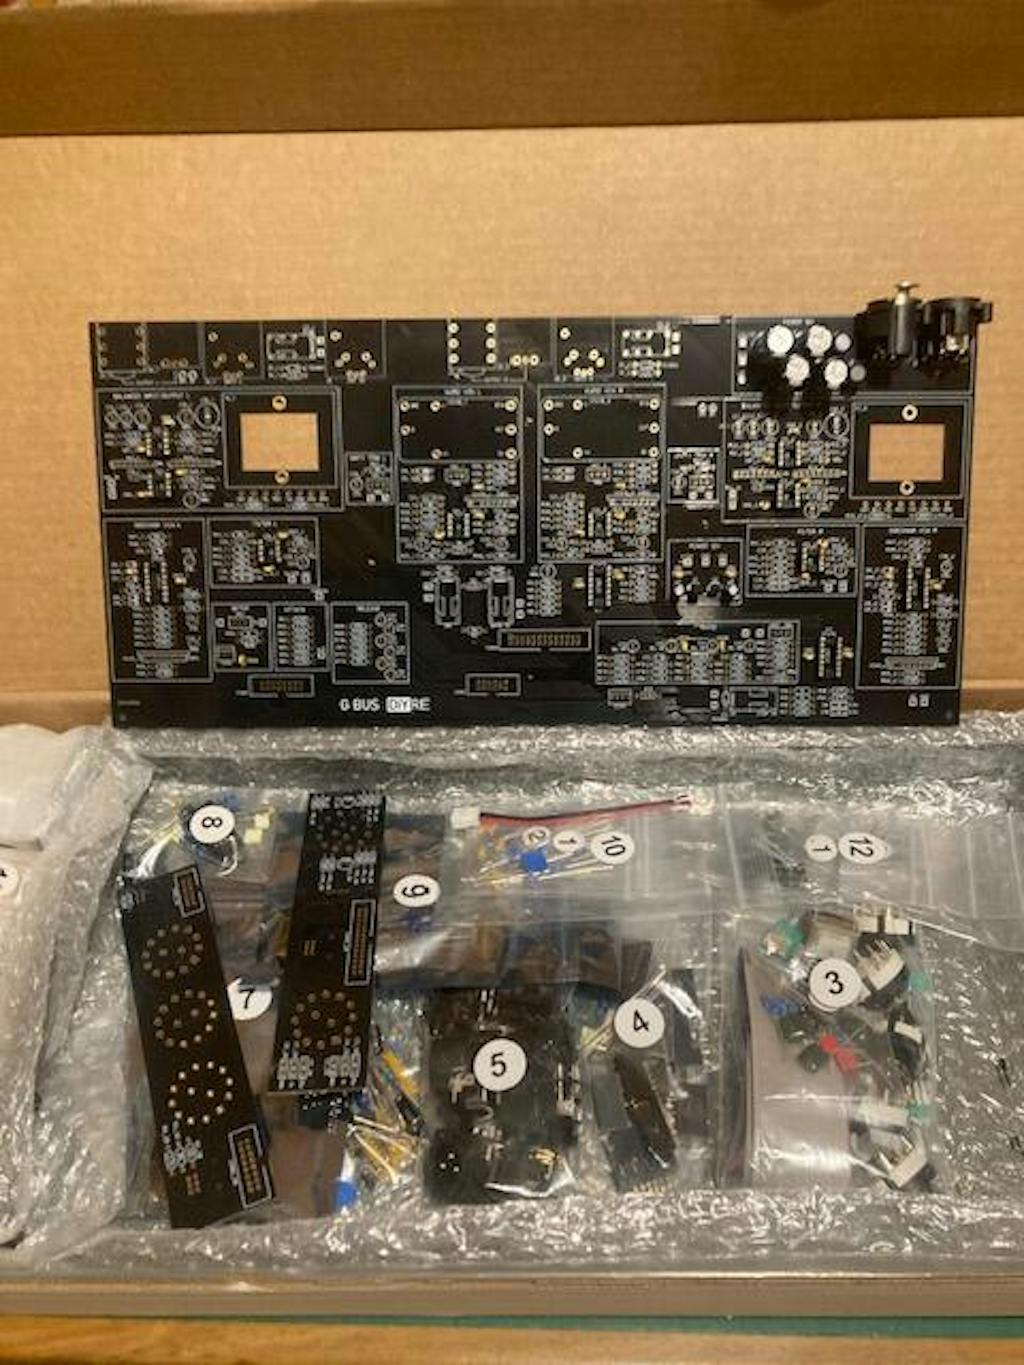
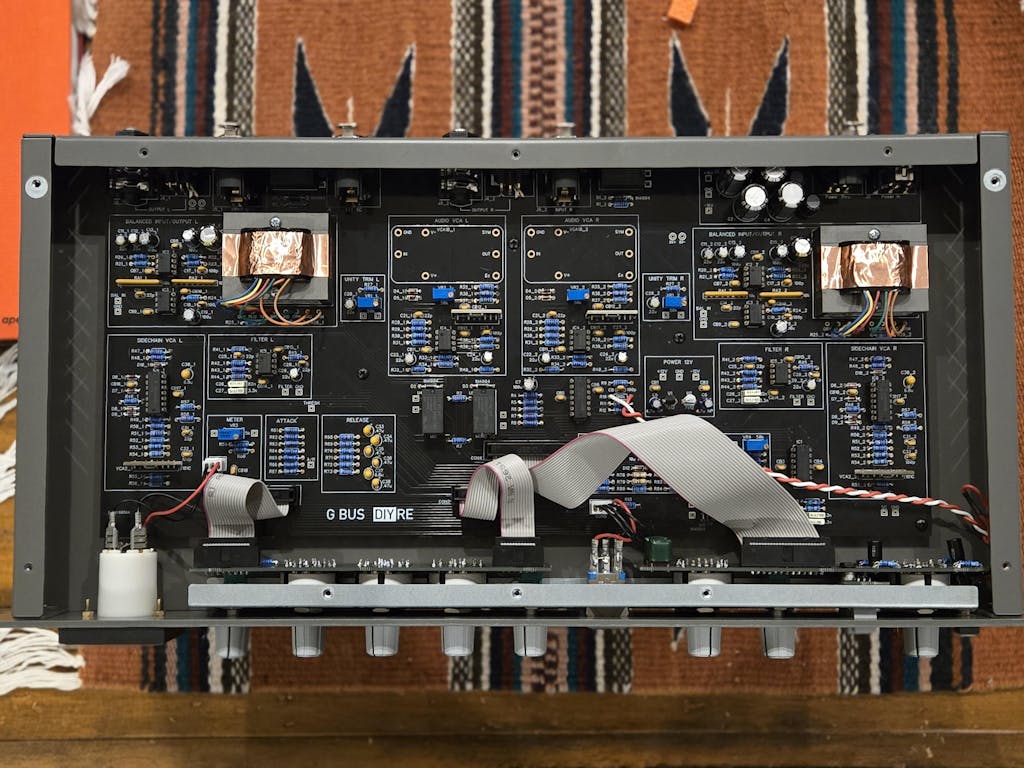
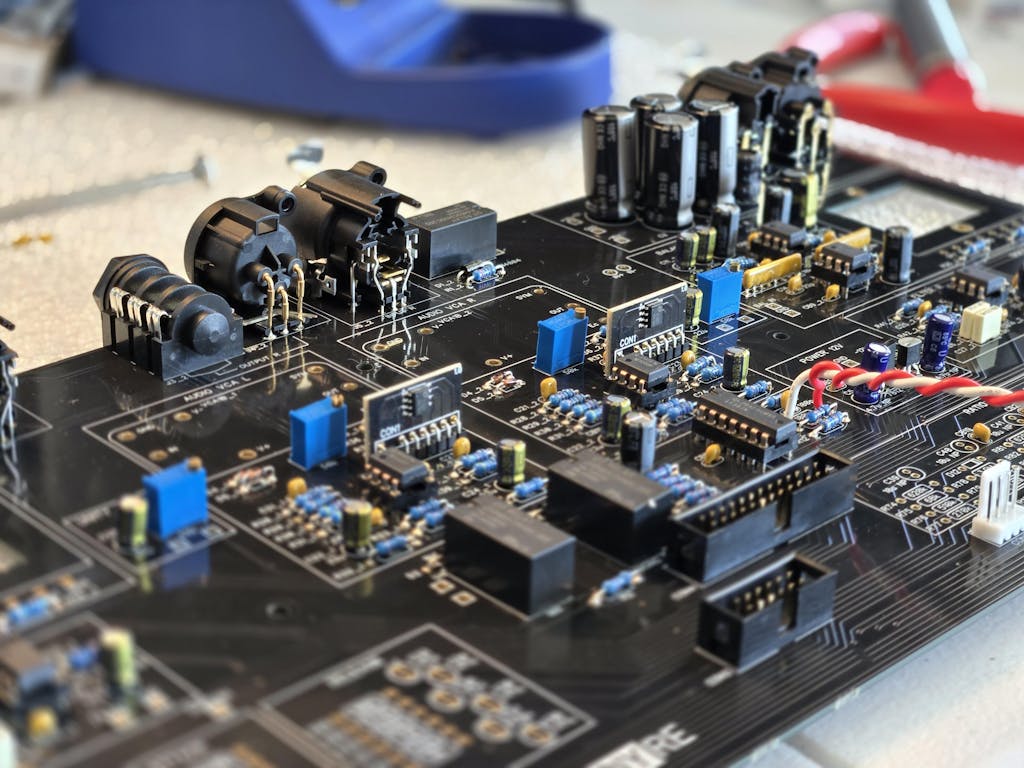
DIY kit
- Comes with every part need to complete kit
- Features step-by-step photo instructions, interactive build map, and component sorting sheet
- PCB is divided into circuit blocks, with corresponding explanations of each block in the assembly guide
Power supply options
All of our rack-mount kits use the same External PSU and feature a THRU jack for daisy-chaining power from one unit to another. This way you can power up to four rack-mount units with only one External PSU.
The External PSU is a universal power supply that connects to the Colour Duo via a 5-pin XLR cable. Choose this option if this is your first rack-mount kit from DIYRE.
The THRU Cable can be used to daisy-chain power from one unit to another. The THRU Cable comes as a kit that you must solder together yourself. Choose this option only if you already have an External PSU from DIYRE.
Design Notes
When we set out to create our own version of the classic VCA bus compressor in 2020, we had two goals in mind:
- To recreate the original console circuit, sound, and behavior as authentically as possible and,
- To incorporate as many as possible of the mods created by the DIY community.
Our process was to begin with the authenticity aspect, make sure we had 100% confidence in that, and then move onto the mods.
Ensuring Authenticity
The first well-documented DIY bus compressor is the Gyraf GSSL, first published in 2002. Almost all DIY (and even assembled!) clones of the last 15 years have been based on Gyraf’s design. So it would have been easy and understandable for us to just recreate this design, throw a few mods on it, and call it a day. But we decided instead that our approach would be to take nothing for granted—to reconstruct the original console circuit part-by-part, and then compare it to the GSSL and later designs to see if there were any changes worth adopting.
In total we found 35 differences between the original and GSSL circuits. Most of these have to do with migrating the compressor from a console into a standalone rack unit, and changing out obsolete parts for currently available substitutes. In the few cases where there was no compelling reason to adopt a change, we defaulted to the original circuit. For the rest, we tested with test equipment and by ear only adopted those that did not meaningfully change the sound or behavior. Here are a few notable examples.
In the audio section, the original uses all NE5534 opamps, GSSL uses NE5532. Although the NE5534 and the NE5532 are essentially the same opamp (the NE5532 is the dual version), some people will argue that they sound different, and even that NE5534s from different manufacturers don’t sound the same. So we decided we could not leave this stone unturned. We tested by building up a prototype with the ability to swap in NE5534s and NE5532s using adapters. We then tested NOS Signetics NE5534 and NE5532, and modern TI versions of both chips against each other. In quantitative measurements, we found very slight differences between them, for example: comparing the unit with all Signetics NE5534 vs all TI 5532 at 1kHz +4dBu, THD was 0.018% for the Signetcs and 0.017% for the TI. However, we could not reliably pick out any differences in blind A/B testing. So, we decided to go with the TI NE5532s to simplify sourcing and assembly.
In the sidechain, the original uses LF351, GSSL uses TL074. This change is essentially the same as the previous one—the LF351 is an older, harder to source chip, while the TL074 is easy to find off-the-shelf. In fact, we almost skipped testing this one, assuming that, since these chips are only in the sidechain, there is no way for their noise, transient response, or distortion to affect the audio. But we ran the tests out of an abundance of rigor and were surprised to find an audible difference. The cause turned out to be DC offset: the LF351 has a small, variable amount of DC at the output that affects the behavior of the compressor. Unlike other changes in the sidechain, this one could not be “calibrated away,” as the offset changes based on the gain of the opamp. The difference is extremely subtle, but could be related to the feel of the compressor. So we decided to stick with the older LF351.
In the original the L and R sidechains are independent until the ATTACK/RELEASE section, in GSSL they are summed. This is a well known change Gyraf made when creating the GSSL. There’s even a mod to revert to the original, stereo sidechain called the “Turbo Mod.” We auditioned both modes and found that the difference is immediately apparent, and that both are useful. So we kept the original as the default mode, and added a MONO SC switch to the front panel to engage the other mode.
The original uses DBX202C VCAs, GSSL and later clones use THAT 218x. The VCAs used in the console are obsolete, rare, expensive, and practically impossible to recreate exactly since the manufacturing process is still a trade secret. So for a new bus compressor to be available to more than a few dozen people, it’s necessary to change the VCA and some of the surrounding circuitry. The VCA is also where many people assume the compressor’s mojo lies, so we knew we would have to do a lot of testing and listening to confidently pick a direction for our design. So we acquired every vintage and modern VCA we could find and ran tests. What we found is that, all other things being equal, there is no meaningful difference between a vintage DBX202 and a modern THAT 218x VCA. That is to say, like the NE553x, there are measurable differences but not audible differences. The biggest difference between them is the gain law, which means they must be calibrated differently. That is, if you simply swap in a different VCA and do not recalibrate the ratio, they will behave and sound different. However, if you do calibrate them to have the exact same ratio, the differences disappear. (This explains why people on forums claim to hear huge differences between VCAs in their bus comp. The difference is due to calibration, not the inherent sound of the VCA.) So we decided to use the modern THAT 2181C VCA, while including a socket for the 202-style ones in the audio section for anyone who has a couple lying around.
The THRESHOLD potentiometer and resistor values are changed. In the digital recording age, people typically operate at higher levels than they did when everything was analog. To account for this the GSSL tweaks the THRESHOLD circuit to make the control less sensitive. We built both the original and GSSL versions and found that, as long as the controls are set to the same absolute threshold values (measuring the control voltage), the behavior is identical. This freed us up to dial in our own ideal THRESHOLD ballistics. Our circuit is pain-stakingly tweaked to have a wider sweet spot while maintaining the +/-20dB range of the original.
There were a few other, smaller changes to the circuit, but in every case the process was the same as above: build up both the original and new versions, run tests, and evaluate whether it affects the sound/performance. We only adopted changes that were necessary and did not affect the sound. The majority of the circuit, most crucially all of the sidechain except for the VCA, is exactly the same as the original.
Incorporating Mods
The VCA bus compressor is without a doubt the most modded project in the DIY pro audio world. So, while our intention was to incorporate as many as possible, there are far too many to fit on one front panel. Our process for selecting them was to build them all up and audition which were the most useful and inspiring.
We built up and tested ten different mods. Here are three of the most interesting.
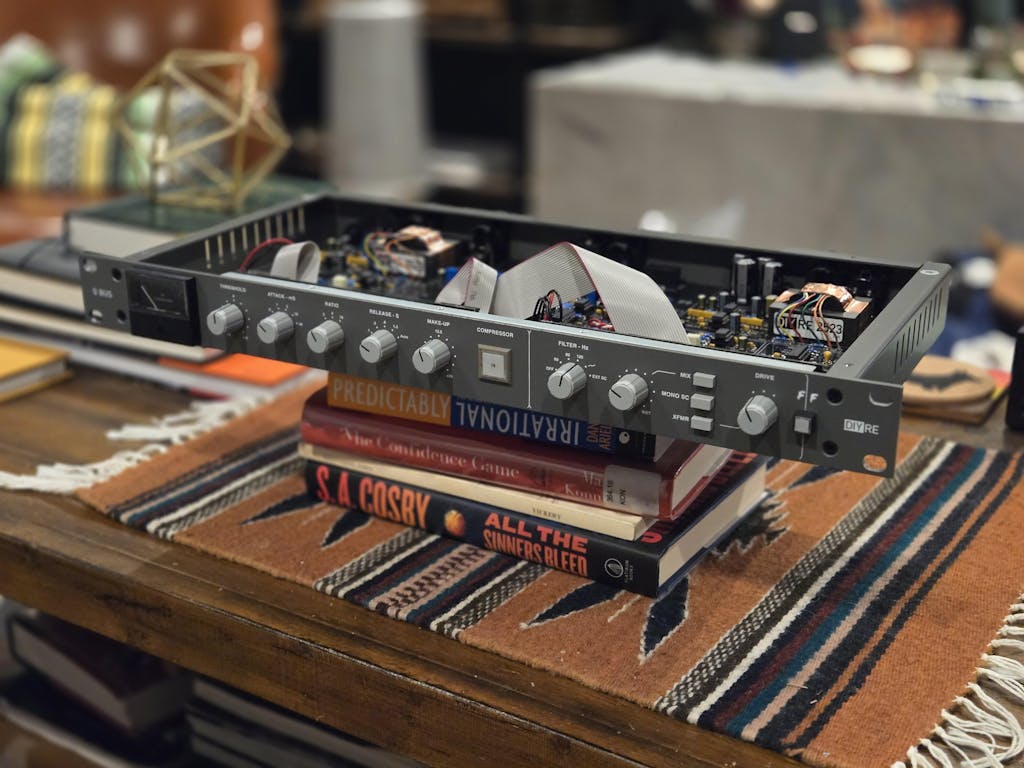
Output transformers. While this style of bus compressor is known to be quite colorful, that color comes almost completely from the compression character. The signal path itself is very clean. This mod adds a bit of vintage tone by replacing the IC-balanced output with a discrete opamp (DOA) and transformer. This was called the “Cavendish Mod” for the GSSL and usually featured API style DOAs and transformers. We built up several variations using two options each for the opamp and transformer.
We settled using the NE5532 opamp with the 2523 transformer. We felt that this combo sounded the best over a wide range of input levels and drive settings, and was close enough to the console sound to feel right.
Feed-forward mode. The G Bus is a hybrid of feed-back and feed-forward compressor designs: it splits off signal to the sidechain before the gain-reduction (feed-forward), but it has a parallel VCA in the sidechain mirroring the gain reduction for feed-back behavior. In an old thread on GroupDIY we found someone suggesting removing a resistor to disable the sidechain VCA, making the circuit completely feed-forward. The idea was that the result might be more like the DBX 160s which are feed-forward VCA compressors. However, the 160 have a different sidechain with an RMS detector to smooth the compression. And indeed, just disabling the sidechain VCA made the G Bus super aggressive and impossible to control. So we set this mod aside as a dead end. However, about a year later we realized that by changing the value of a different resistor (or even better, replacing it with a trim pot) we could reduce how much the sidechain VCA affects the gain reduction—essentially mixing between feed-back and feed-forward modes. This effect is fun and usable at some settings, but a bit too eccentric for the front panel. So we have included it as an “under the hood” mod in our documentation for the kit.
Additional RATIO settings. We anticipated that adding more ratios would be a common request so we did a deep dive into the ratio behavior and circuitry. Understandably, many people nowadays might find the idea of just three settings (2:1, 4:1, 10:1) limiting. So some clones have added additional settings like 1.5:1, 3:1, and 20:1.
To get a sense of how ratio settings actually behave, we measured the ratios of four clones: two hardware and two software, including the plugin from the company that originally designed the compressor. We found that while some were closer than others, none actually compressed at the ratios shown on the front panel at every setting. For example, the closest measured 1.79:1, 3.34:1, 9.07:1, while the furthest off measured 3.2:1, 12.85:1, 20.74:1. This indicated to us that it was in no way trivial to set the ratios precisely.
Additionally, the three ratios can not all be precise at the same time. That is, if you set 4:1 to be exact, 2:1 and 10:1 will be slightly off and so on. So we concluded that it’s better to think of the ratios as “low, medium, high” than as precise numbers. The upside of this is that you can use the ratio trim on the G Bus to shift all three settings higher or lower. For example, you could achieve ratios of close to 1.5:1, 3:1 and 8:1, or 4:1, 10:1, and 20:1.
Moving onto the circuit, we discovered that each ratio setting was a rather complex passive network controlling the amount of gain in the sidechain (ratio) as well as its DC operating point (threshold), and that circuitry from each setting affects the others. It’s the kind of circuitry that was clearly arrived at after lots of manual tinkering and pulling out of hair. In a passive network like this one, everything affects everything else. So there is no way to add more settings without affecting the existing ones. Since our design philosophy with the G Bus was to first recreate the original faithfully, and then add mods as long as they did not dilute the authenticity, we decided not to touch the ratio circuit. Instead, the user can shift the range up or down using a trim pot.
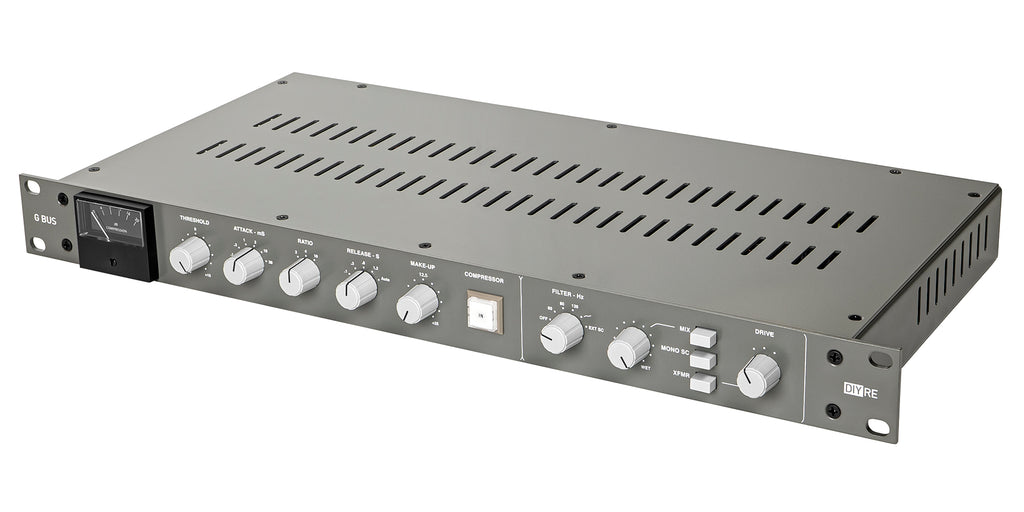
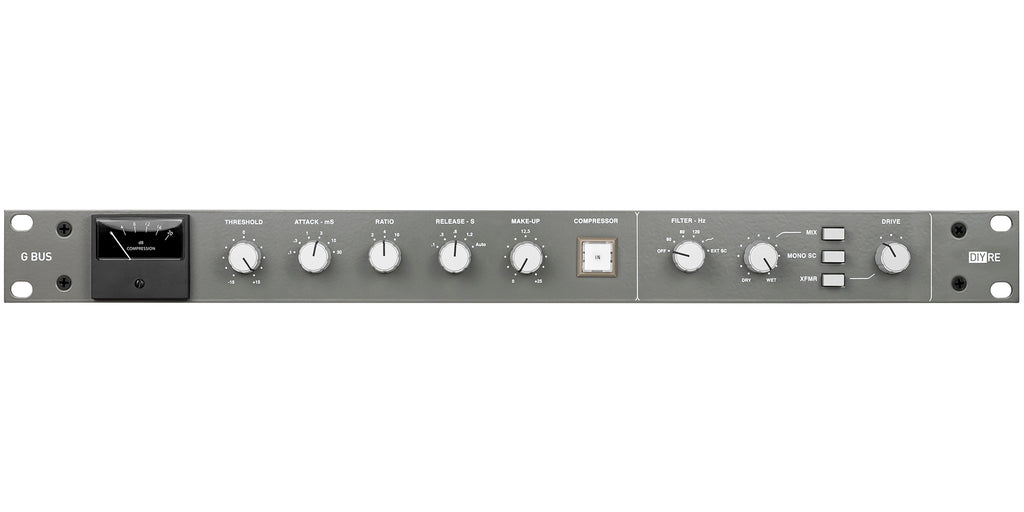
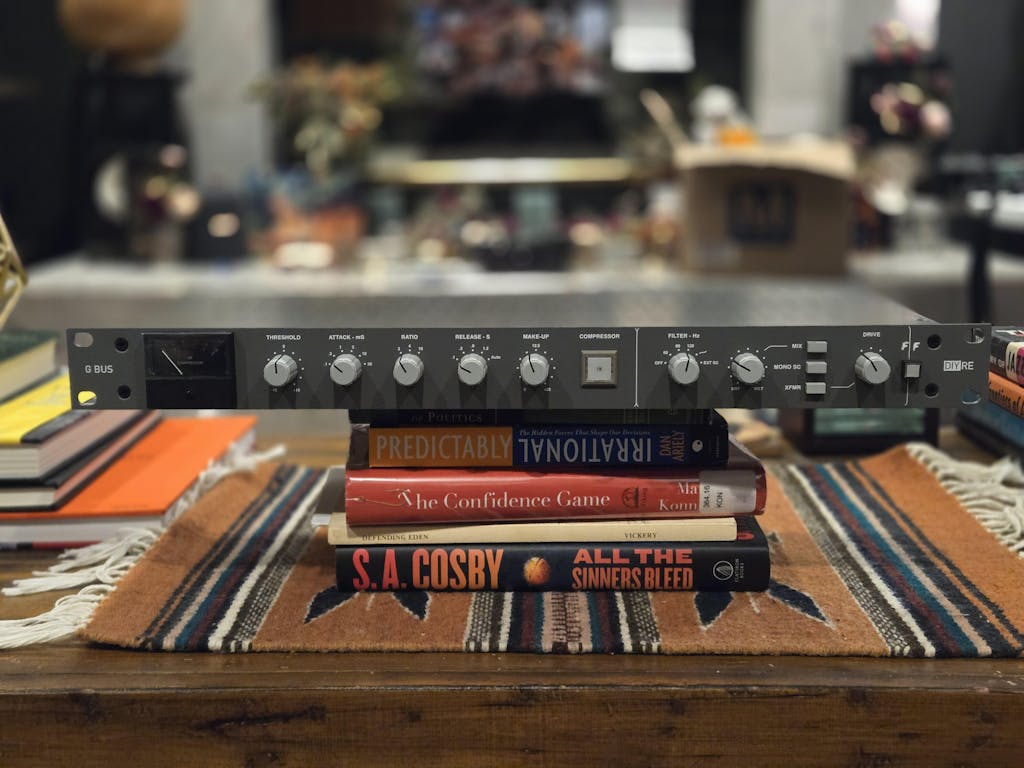
The Look
In order to do the G Bus justice, we knew it had to look as authentic as it sounds. The biggest challenge here was getting the colors right. The original console employed a palette of several grays and tans, and anyone who’s tried to get a new can of paint close enough to the color of their walls for touch ups knows how difficult it is to match neutral tones precisely. In this we were assisted by the Pantone system, which instructs paint mixers exactly how much of each pigment to mix for each hue. We booked at a studio with an old console, brought in a Pantone book and found the colors for the knobs, switches, and powder coating. This allowed us to specify exact colors for the panel and the large, pushbutton IN switch. For the knobs and switch caps, we were lucky that they are still made by the same manufacturer to the same spec. The final challenge was that the meter and KD2 are now illuminated by LEDs instead of little luminescent bulbs. We specified an LED color with more red/yellow to mimic the spectrum of an incandescent bulb. The result of all this nitpicking is the most authentic looking VCA bus comp on the market.
Specs
| Input Impedance | 10kΩ |
| Max Input Level | 27.5dBu |
| Output Impedance | 100Ω |
| Max Output Level | +22dBu |
| Noise | -85dBA |
| Frequency Response | ±0.2dB 20Hz to 20kHz rel. 1kHz |
| Power Rails | ±16vDC, +48vDC |
| Power Input | 100-240VAC, ~50/60Hz 2.5A |
| Dimensions | 19" x 1.75" x 8.5" |
Resources
Customer Reviews
Man, this thing absolutely slams. Only issue I with my unit is I don't have two of them! The transformer circuit alone is amazing.
I just finished building this up and have tested it both with live sources (mostly voice) and with some prerecorded sources. The bottom line is that the build was very straightforward and took about a day even with my slow and mediocre soldering technique and usual quota of mistakes. The compressor works and sounds great. It's a classic VCA compressor, and I mean that in the most positive sense possible. It won't give you the same sonic character as a FET or optical compressor, and those may be better choices for some tracking uses, but it's wonderful for relatively subtle final compression on mixes.
I haven't tried the external sidechain yet but that was a big selling point for me, especially since I like to duck, and also to compress my stems separately but using the rough mix as sidechain
is the bes g bus clone compressor!! its amazing!
Alright, so you're interested in a bus compressor, you've done your research, and now you're here looking at this thing in your cart wondering if you should pull the trigger.
Just do it.
Peterson has created an absolutely stunning piece of gear here - a SSL style bus compressor is one in a dozen, but he's put in the work to make this thing not just another Gyraf ripoff (no offense to Jakob's insane generosity and brilliance), but its own unique version with just the right mods and meaningful part choices.
This isn't even mentioning the instructions and interactive build map he created - something like this makes building this compressor akin to building a Lego Deathstar or something... it brought me back to those days where the instructions were clear, concise, legible, and overall just enjoyable to work through.
I have a pretty thorough understanding of audio electronics, but I feel like you could get through this build with a mid-level understanding, attentive mind, and Google. Advanced builders will find this highly enjoyable. It took me about two full days to build.
I did incorporate the Feed-Forward mod with a switch on my build. As laid out in the build/mod guide, I had R10 switching in a series resistor and ended up liking the sound of an additional 300k (so 400k) for feed forward. There was just enough room to drill a hole on the far right of the faceplate and mount a small push button.
Again, I had a blast building this thing. Peterson, insanely well done. Can't wait to put it on some records :)
Very professionally made kit with instructions for assembly and especially G BUS calibration. I highly recommend it.